

Creative tools are the core of PRIZ. They help you analyze, question, and generate ideas beyond previous experience — the psychological inertia that otherwise steers every solution toward what you already know.
In the sidebar, the stage is labeled Creative tools. The page heading is the same. The one-liner under it is: We all think under psychological inertia, which directs us to solve problems based on our previous experience only. The breadcrumb says Tools list. You can open the same tool type more than once; each use appears as its own item on this page.
This article covers the tools list, how to choose a tool, and how tools connect to Ideas. For the full project map, see Project Structure. For defining the problem first, see Problem Statement. How to use each individual tool lives in that tool’s own knowledge-base article.
Sign Up & Login
This document assumes you have already registered, logged in, and created a project. If you need help with those steps, see Sign Up & Login Instructions and Creating Projects.
Open Creative tools
Open Creative tools from the left menu, or click Next from Problem statement. From Problem statement, Next goes to the tools list with a #create hash. If the list is still empty, the tool picker opens automatically. If you already have tools, you land on the list and can click New yourself.
You can also start a tool from the project header quick-create menu (Start new tool), which opens the same picker.
When the list is empty
A new project has no tools yet. You see a toolbox illustration, the message You haven’t created any tools yet., and: Creative tools help you analyze, question, and generate ideas using proven thinking approaches.
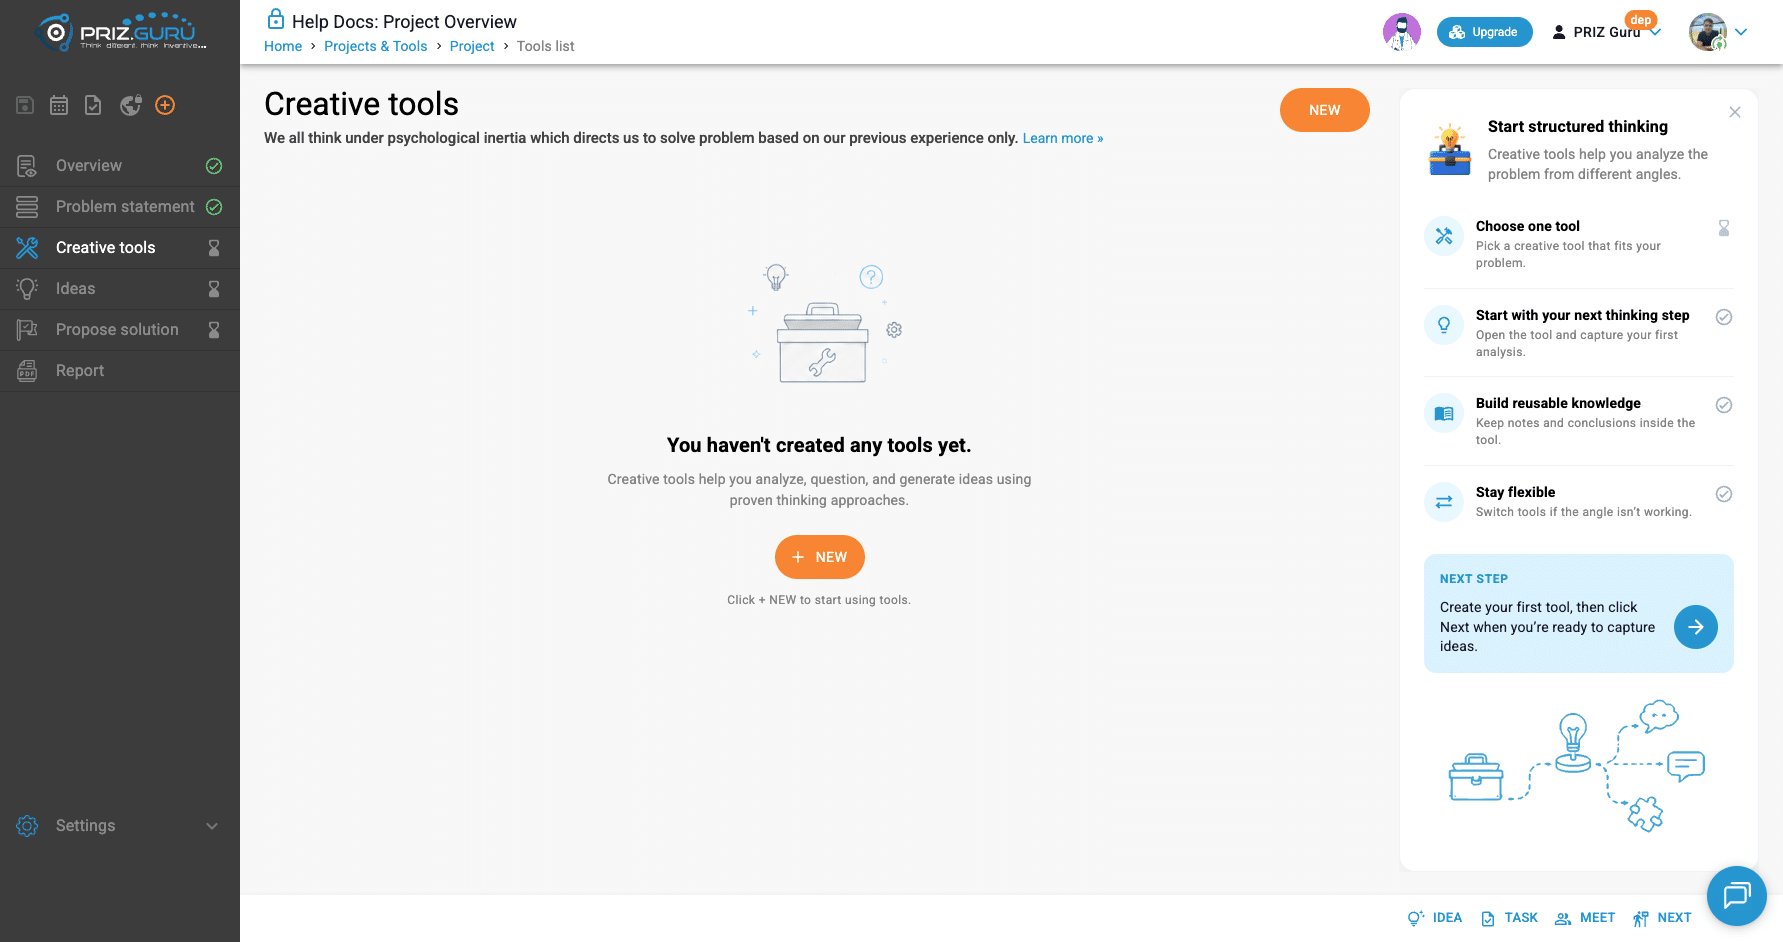
The orange New button appears in the header and again in the empty state. The empty-state helper says Click + NEW to start using tools. (the button label itself is New).
Guidance panel title: Start structured thinking. Subtitle: Creative tools help you analyze the problem from different angles. Checklist:
- Choose one tool — Pick a creative tool that fits your problem. (required)
- Start with your next thinking step — Open the tool and capture your first analysis.
- Build reusable knowledge — Keep notes and conclusions inside the tool.
- Stay flexible — Switch tools if the angle isn’t working.
NEXT STEP: Create your first tool, then click Next when you’re ready to capture ideas.
Choose a tool
Click New. The dialog title is Choose your next creative tool. Tools appear as a flat grid (no category groups). Each card shows the tool name, a short description, Use, and Learn more.
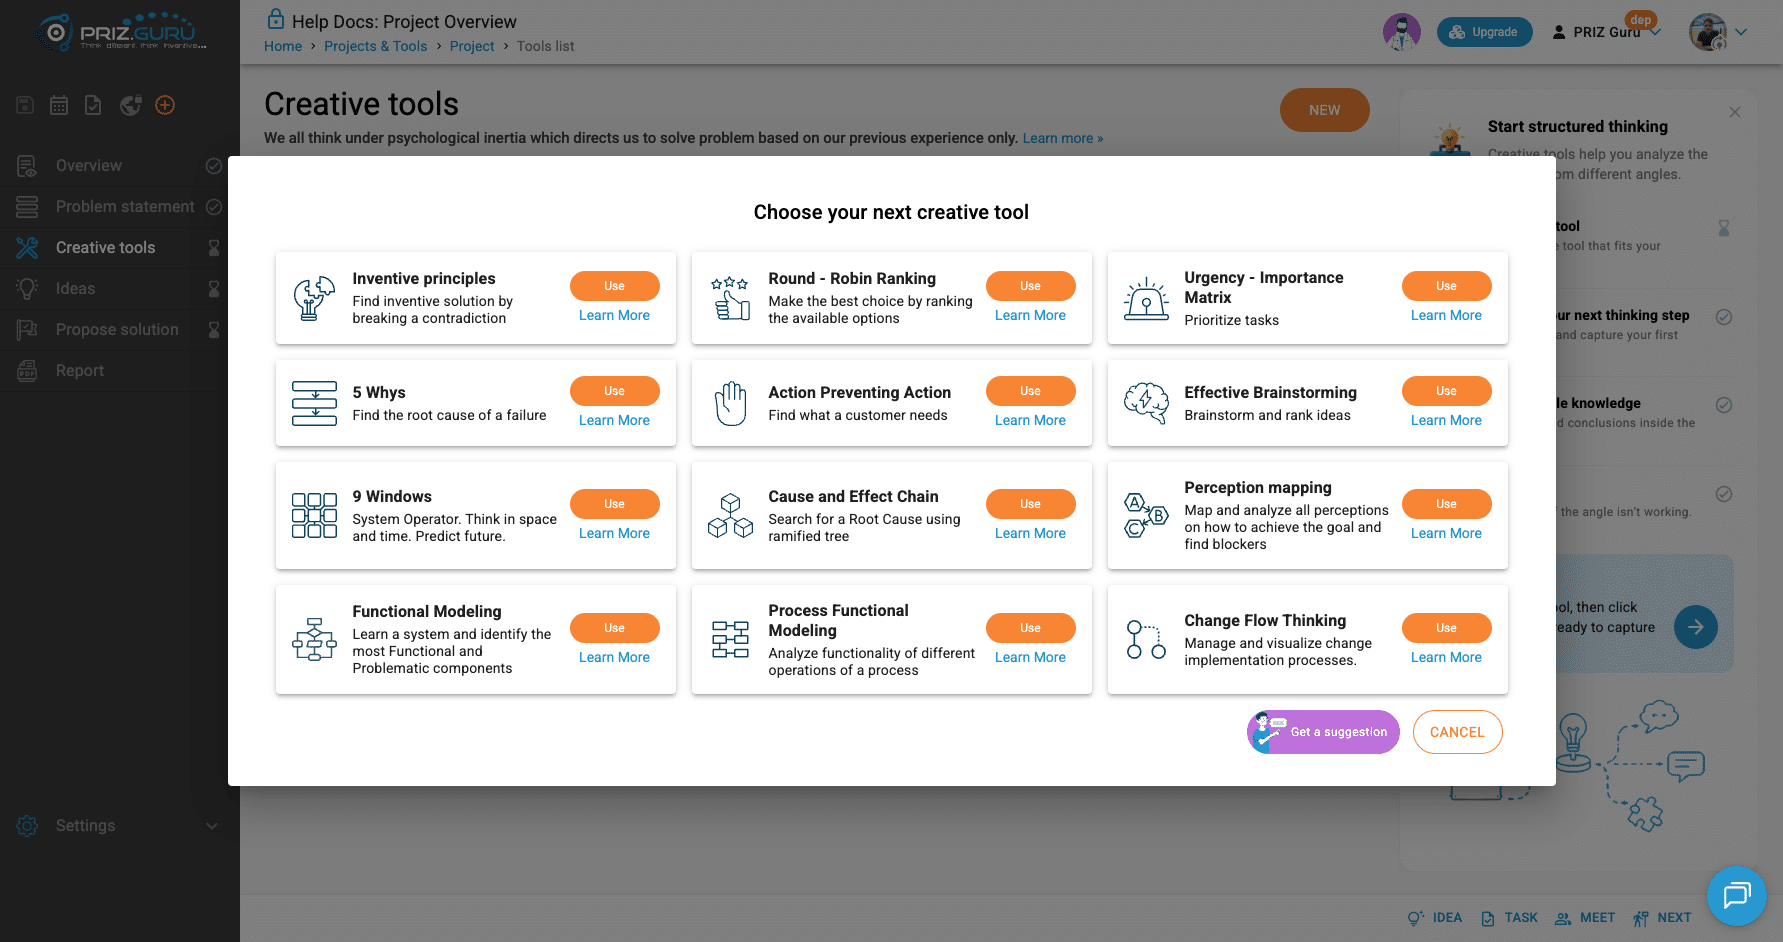
Tools you may see today (exact names in the picker):
- Inventive principles — Find inventive solution by breaking a contradiction
- Round – Robin Ranking — Make the best choice by ranking the available options
- Urgency – Importance Matrix — Prioritize tasks
- 5 Whys — Find the root cause of a failure
- Action Preventing Action — Find what a customer needs
- Effective Brainstorming — Brainstorm and rank ideas
- 9 Windows — System Operator. Think in space and time. Predict future.
- Cause and Effect Chain — Search for a Root Cause using ramified tree
- Perception mapping — Map and analyze all perceptions on how to achieve the goal and find blockers
- Functional Modeling — Learn a system and identify the most Functional and Problematic components
- Process Functional Modeling — Analyze functionality of different operations of a process
- Change Flow Thinking — Manage and visualize change implementation processes. (may be hidden if that feature is not enabled for your workspace)
Click Use to create the tool and open it. Learn more opens that tool’s documentation. Cancel closes the dialog without creating anything.
Get a suggestion (AI)
Not sure which tool to start with? Click Get a suggestion at the bottom of the picker. The assistant uses your project background and Problem statement, then recommends tools for your situation.
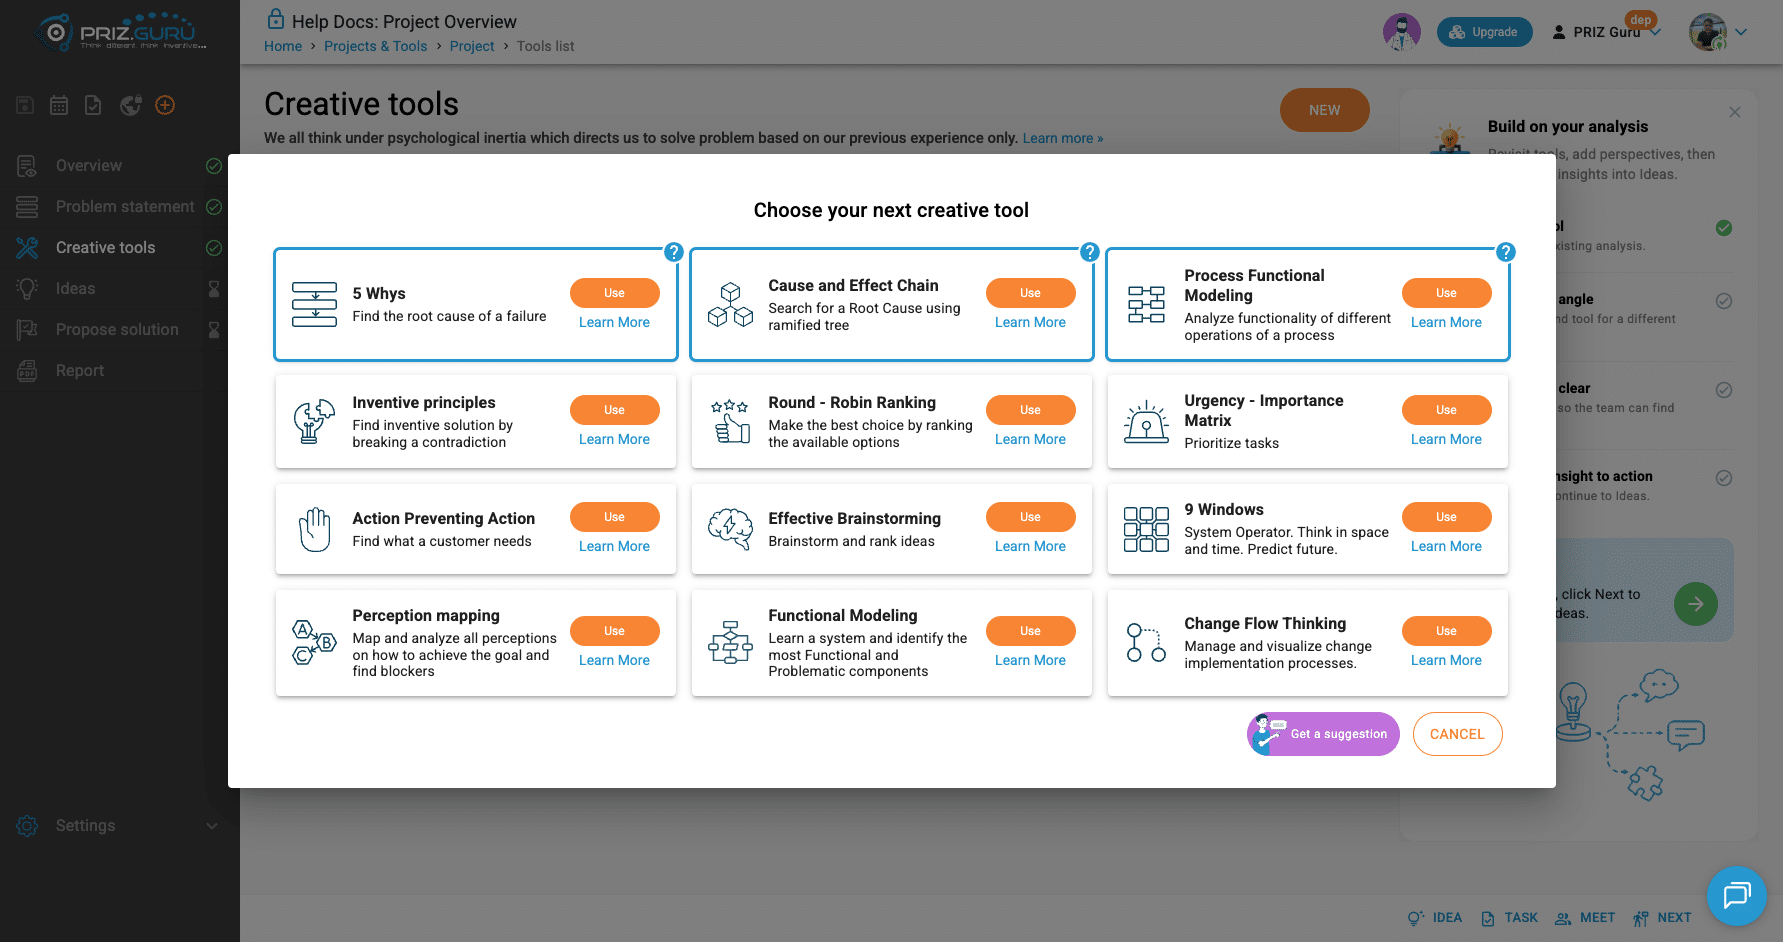
Suggested cards move to the top of the grid and get a blue outline. Hover the question mark (?) on a suggested card to read why that tool was recommended for your project.
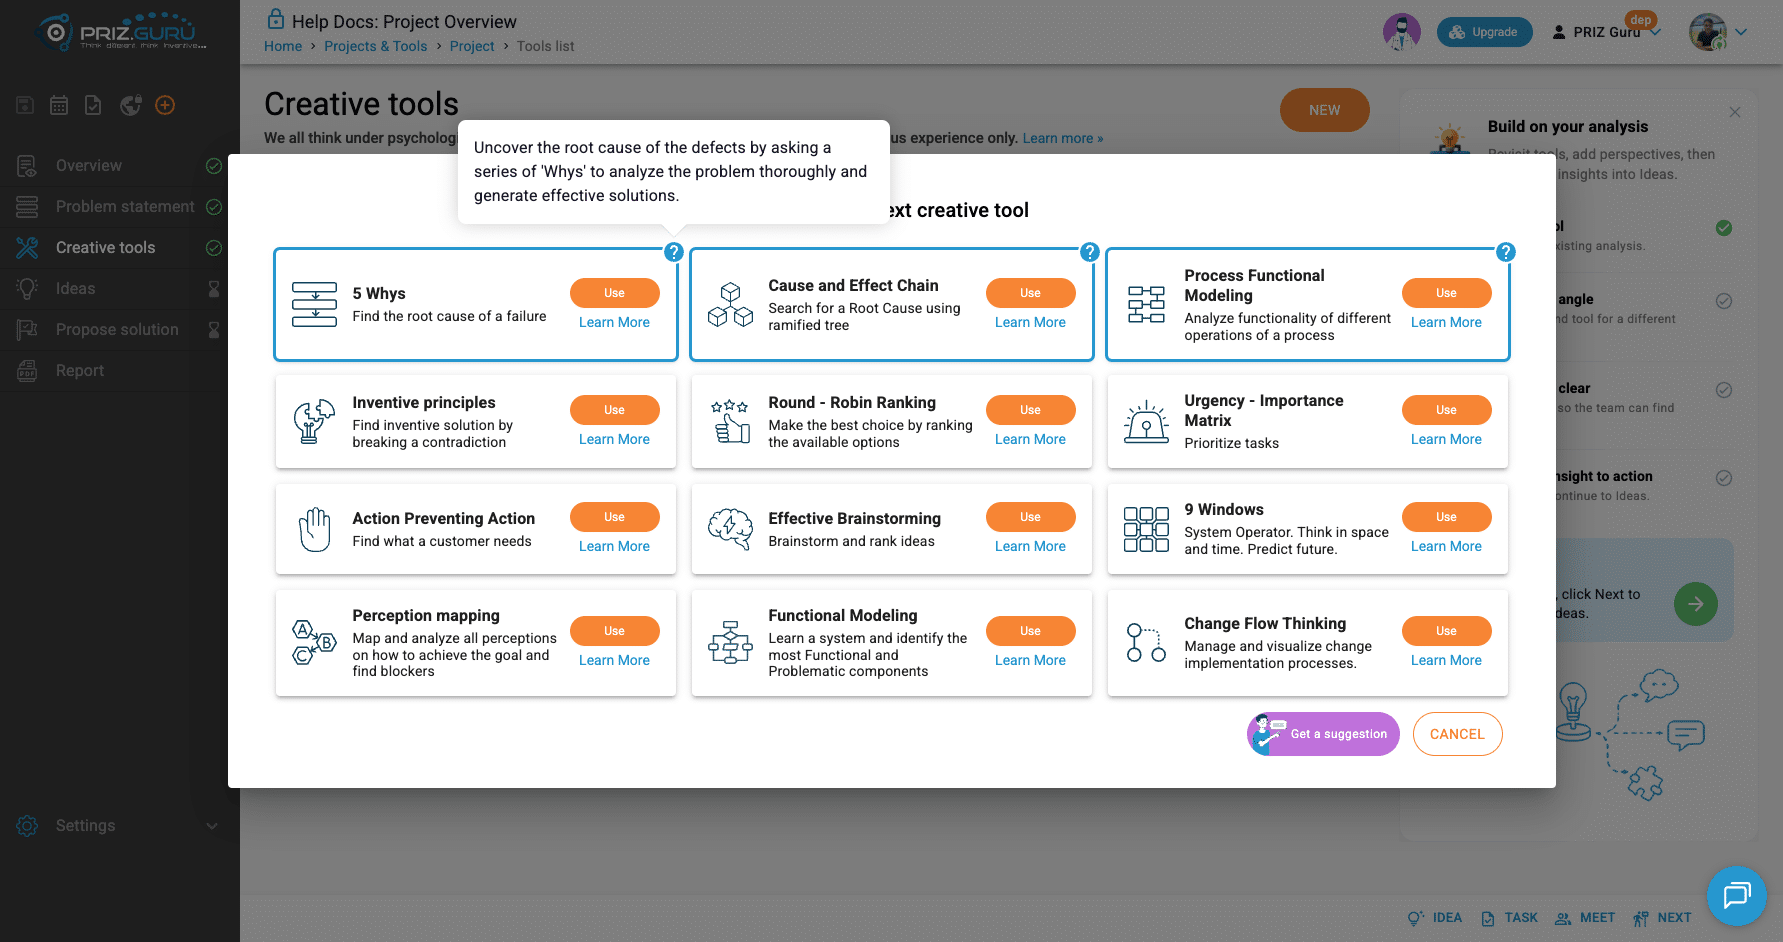
Treat suggestions as guidance — pick the tool that fits your next thinking step.
Get a suggestion stays disabled until Overview background is filled with at least 30% completeness and all five Problem statement sections have content. Hover the button to see what is still missing.
Some plans limit how many tools you can create. If a tool is locked, clicking Use opens the upgrade path for your workspace.
Work in a tool
Each tool opens on its own page. The pattern is shared even though the workspace differs:
- Editable title (pencil) — rename so your team can find the usage later
- Tool one-liner and Learn more » when available
- Tool-specific workspace (fields, diagrams, tabs such as conclusion or report preview)
- Autosave — there is no separate Save button
- Footer Idea, Task, Meet, and Next (Next goes to Ideas)
- Delete tool when you need to remove that usage (confirm dialog warns that related data is permanently deleted)
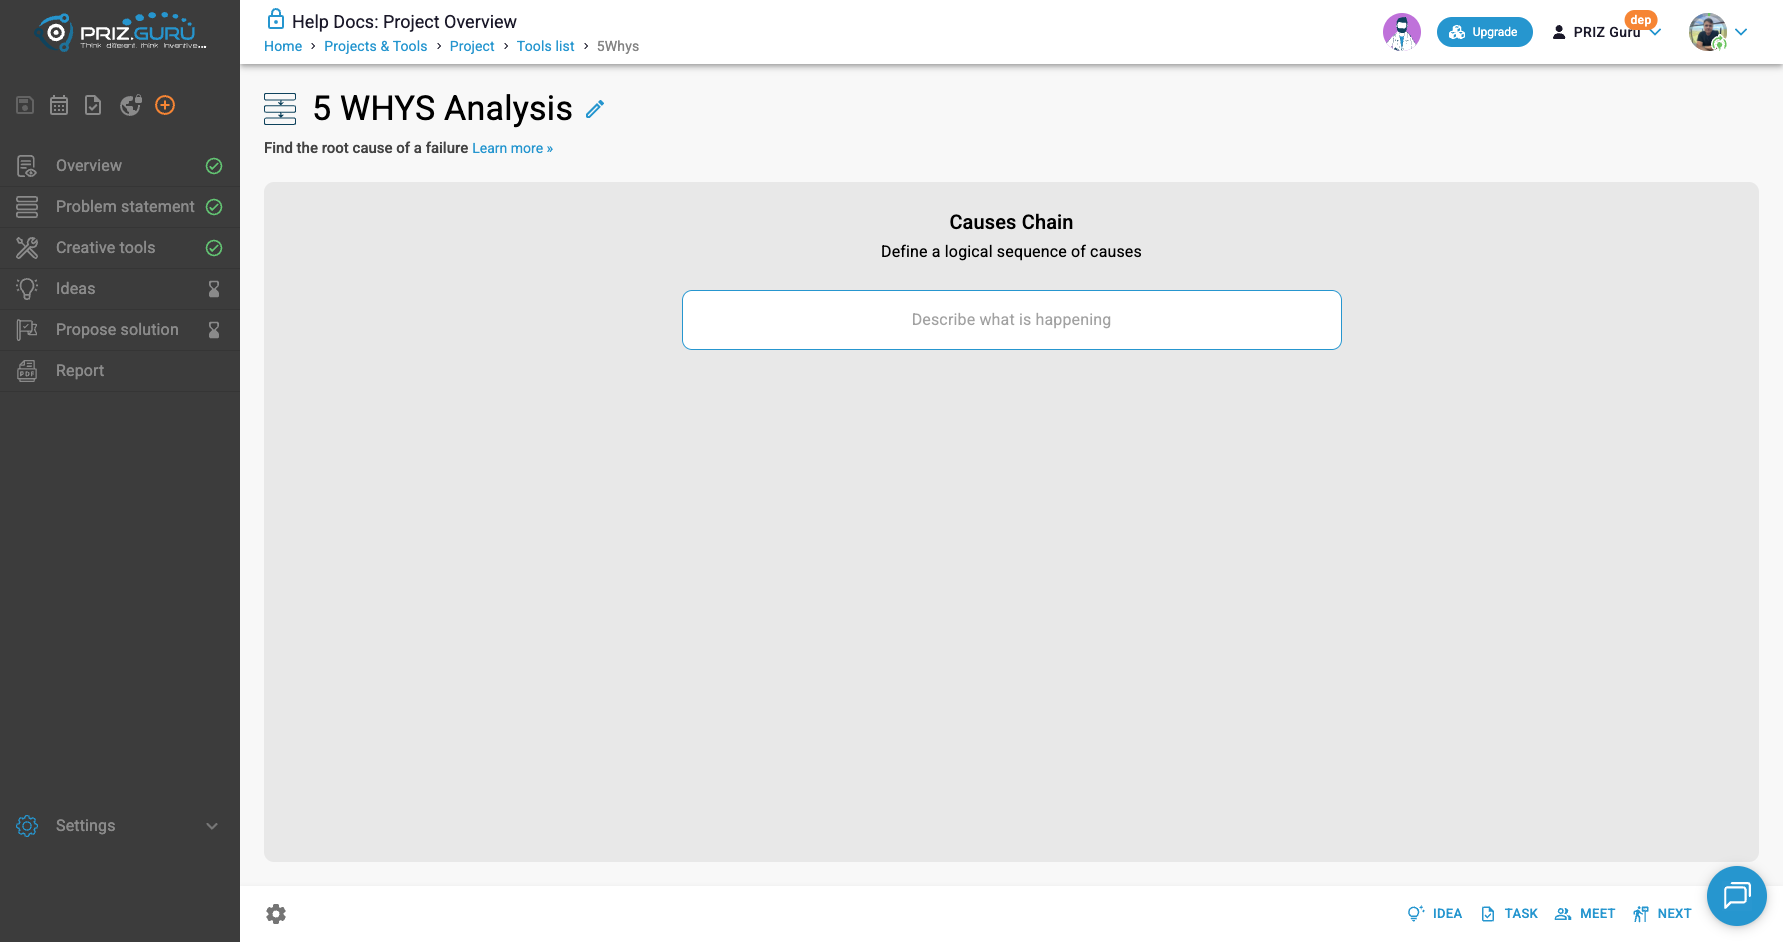
Step-by-step how-tos for 5 Whys, Functional Modeling, Cause and Effect Chain, and the other tools are in their dedicated articles — not here.
After you have tools
Back on the list, each usage is a card: tool icon, editable title (defaults to the tool type name), and Used at: with the date and time. Click the card to reopen that session.
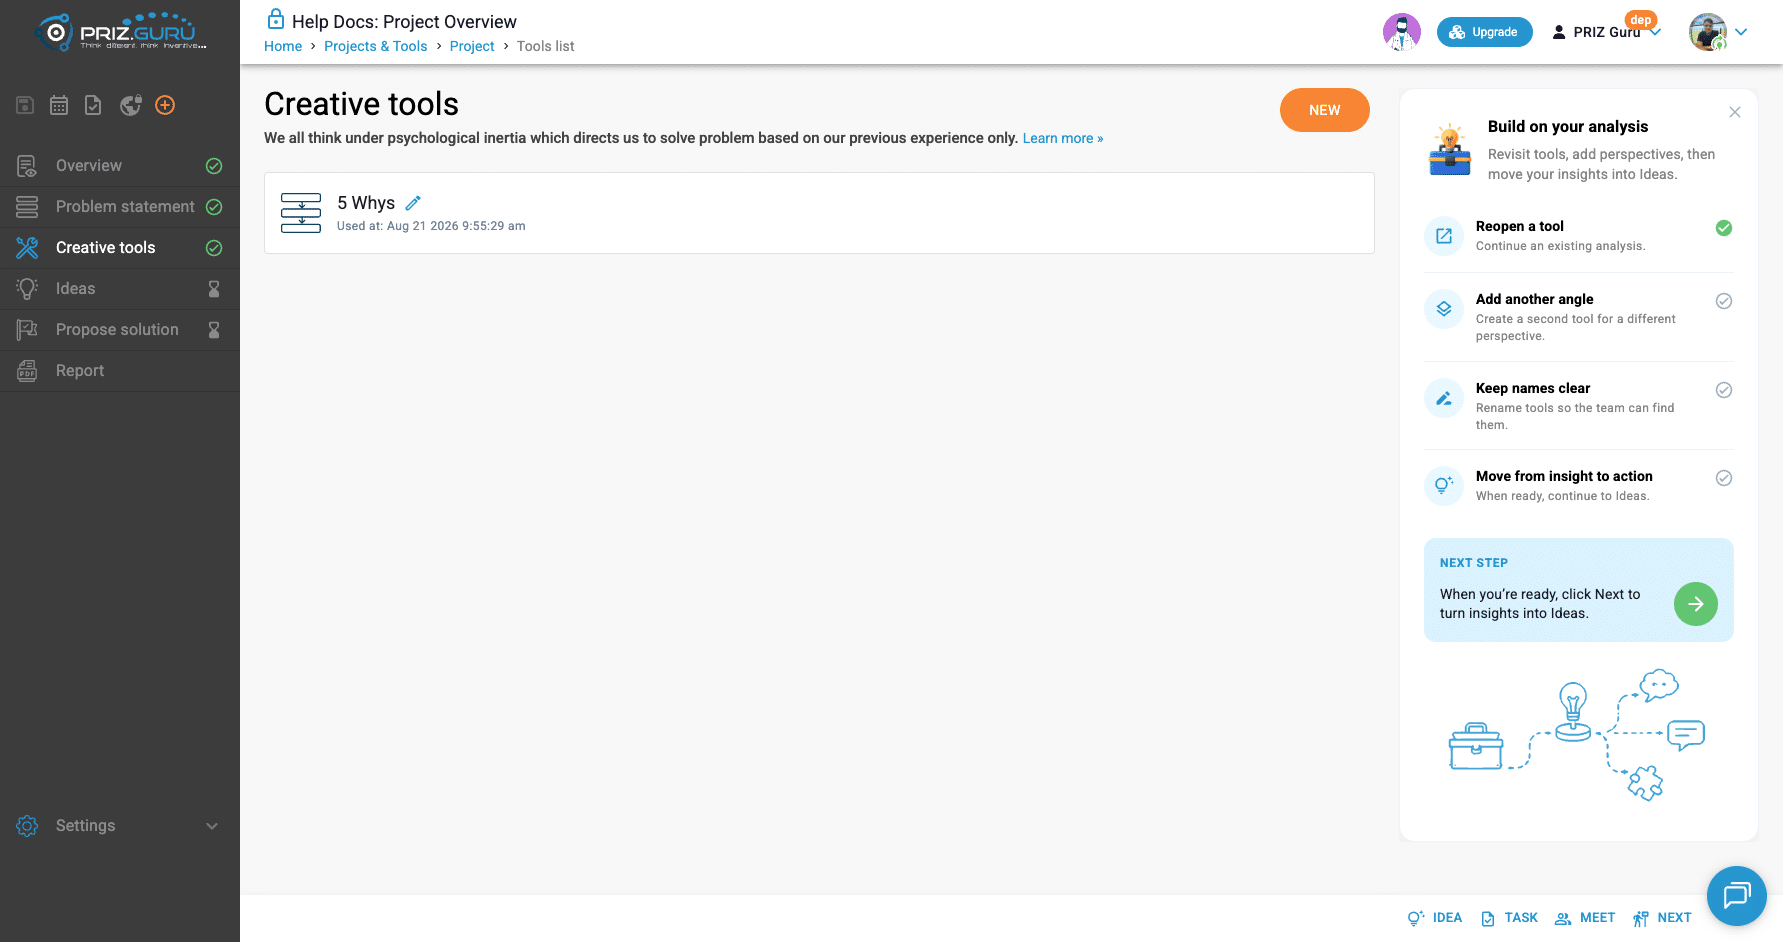
Guidance panel title becomes Build on your analysis. Subtitle: Revisit tools, add perspectives, then move your insights into Ideas. Checklist:
- Reopen a tool — Continue an existing analysis.
- Add another angle — Create a second tool for a different perspective.
- Keep names clear — Rename tools so the team can find them.
- Move from insight to action — When ready, continue to Ideas.
NEXT STEP: When you’re ready, click Next to turn insights into Ideas.
Some tools can nest related child usages (for example, ranking under brainstorming). Expand those on the list when they appear.
Dismiss guidance with Close guide. Restore with rocket Show guide (desktop).
Move insights into Ideas
Finishing a tool does not automatically push ideas into the project Ideas list. Capture project ideas with footer Idea, the header quick-create, or the Ideas page. From a tool, an Idea can keep a link back to that tool as the source.
Ideas that live only inside a tool (for example, brainstorming options) stay there until you record them as project ideas. When you are ready, use footer Next or the guidance CTA to open Ideas.
Managing and ranking ideas: Ideas Management.
Permissions and limits
You need to be on the project team, and the project must not be archived or locked by certification, to create tools, edit them, or use Idea / Task / Meet. Read-only banners match Overview (Archived, Readonly, Finalized, Review, Certified).
Plan limits can block creating more tools of a type. Change Flow Thinking may be absent when that feature flag is off for the workspace.
Tips
- Define the problem first when you can — Problem statement context improves tool choice and suggestions.
- Start with one tool. Add another angle when you need a different view.
- Rename usages early so the list stays readable for the team.
- Use Idea as soon as something is worth keeping outside the tool.
- Per-tool depth belongs in that tool’s article; this page is the map of the Creative tools stage.
That’s it. I hope it’s clear and easy.
P.S. Please let us know if you require any assistance.