System Functional Model, also known as Function Modeling, is a popular problem-solving tool that helps us to model a problem using functional language and identify problematic and functional components.
This help article describes a step by step instructions of how a problem solver can effectively use the functional modeling method to better identify how the problem can be caused and which component is responsible for it.
First, let’s take care of some definitions.
Glossary & Definitions
System
The system, also called Engineering Systems, is a set of connected “things” or devices (components) that operate together for the purpose of creating/producing a product. Most engineering systems have only one product.
Product
Product is what the engineering system was originally designed to produce. As the simplest example, we can talk about some sort of machine that creates bricks (or any physical thing). However, the product can technically be anything or, in fact, anybody. The most important aspect is that the system under analysis is built for the purpose of this product – to create, to build, to maintain, etc…
A less obvious, but worth mentioning example is a car. What is the product of a car? Interestingly enough, it is a driver/person. The car is a system that is built to move a person (or maybe cargo).
The more scientific definition – a system is changing a parameter of a product, and it is built to do so. You will see more clarity during the explanation of a function.
Component
As mentioned above, a component is any part of the engineering system. Here too, it can be any mechanical part, as well as a human. Anything that takes part in an engineering system can be treated as a component.
In the example of a car, it can be the engine, body, wheel, windows, etc…
Supersystem
Supersystem is a component that contributes to the main function of a system but does not belong to the system are considered a supersystem. The best way to identify a supersystem is by asking the question “can we affect this component within the scope of the system?”. If the answer is no, the is by definition a supersystem. Continuing the example of a car, the supersystems can be air, rain, pollution, road, etc… However, that is not the only case when a component can be defined as a supersystem.
As with any other analysis, the purpose of functional modeling is to eventually improve a system by applying one or more changes. In case we decide that we don’t want to touch a component (we don’t want to change) as part of this project, we can define it as a supersystem.
Function
A function is an action between two components – action between the subject and the object. In the world of functional language, a function exists if and only if a subject changes any parameter of an object. Without parameter change, there is no function. For example, if you are just thinking about driving a car, there is no parameter change of the car; however, if you drive the car, you make it move (change its parameter).
Functional modeling operates with 4 different types of functions. 3 useful and 1 harmful.
Useful functions
- Useful – when the action leads to an expected parameter change of an object
- Insufficient – is a useful function, but when the parameter change is below the expectation
- Excessive – is a useful function, but when the parameter change is above the expectation
- Harmful function – when the action causes an unexpected (against expectations and potentially harmful) parameter change on an object
Using Function Model
In this article we will not dig too much into the why to use functional modeling, when is it useful and what are the use-cases. For that, we have a number of blog articles that we welcome you to read. Here, we will concentrate on the step-by-step instructions and mechanism of how to use the tool.
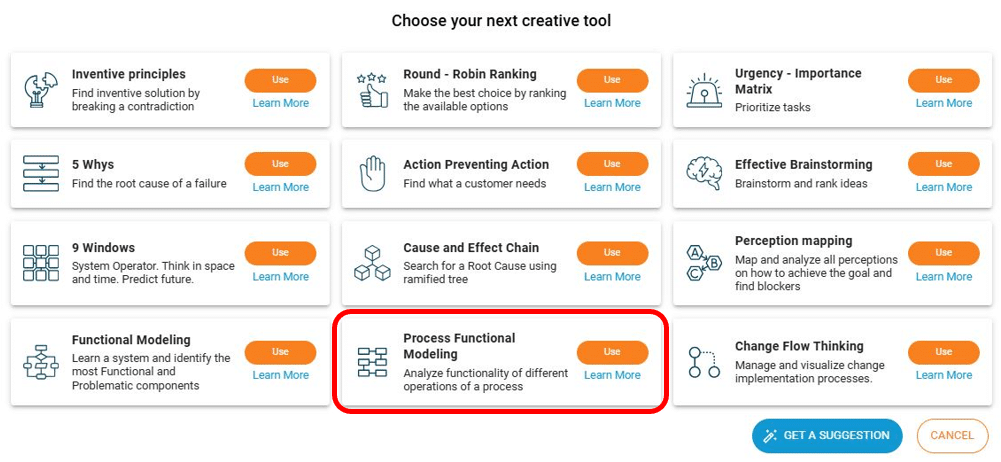
First, we assume that you already know how to start using a new tool. For more information about that visit Creative Tools article. Perception Mapping is one of the available tools in the PRIZ Innovation Platform.
Once the tool is created, you will be redirected to the tool itself.
Similar to many other tools, Functional Modeling has a number of sections:
- System – a free form description of a system that you are planning to analize
- Model – where you will build the actual model
- Results – visual and numerical, automatically calculated, representation of results.
- Conclusions – free form description of any conclusions that came out of the analysis
System
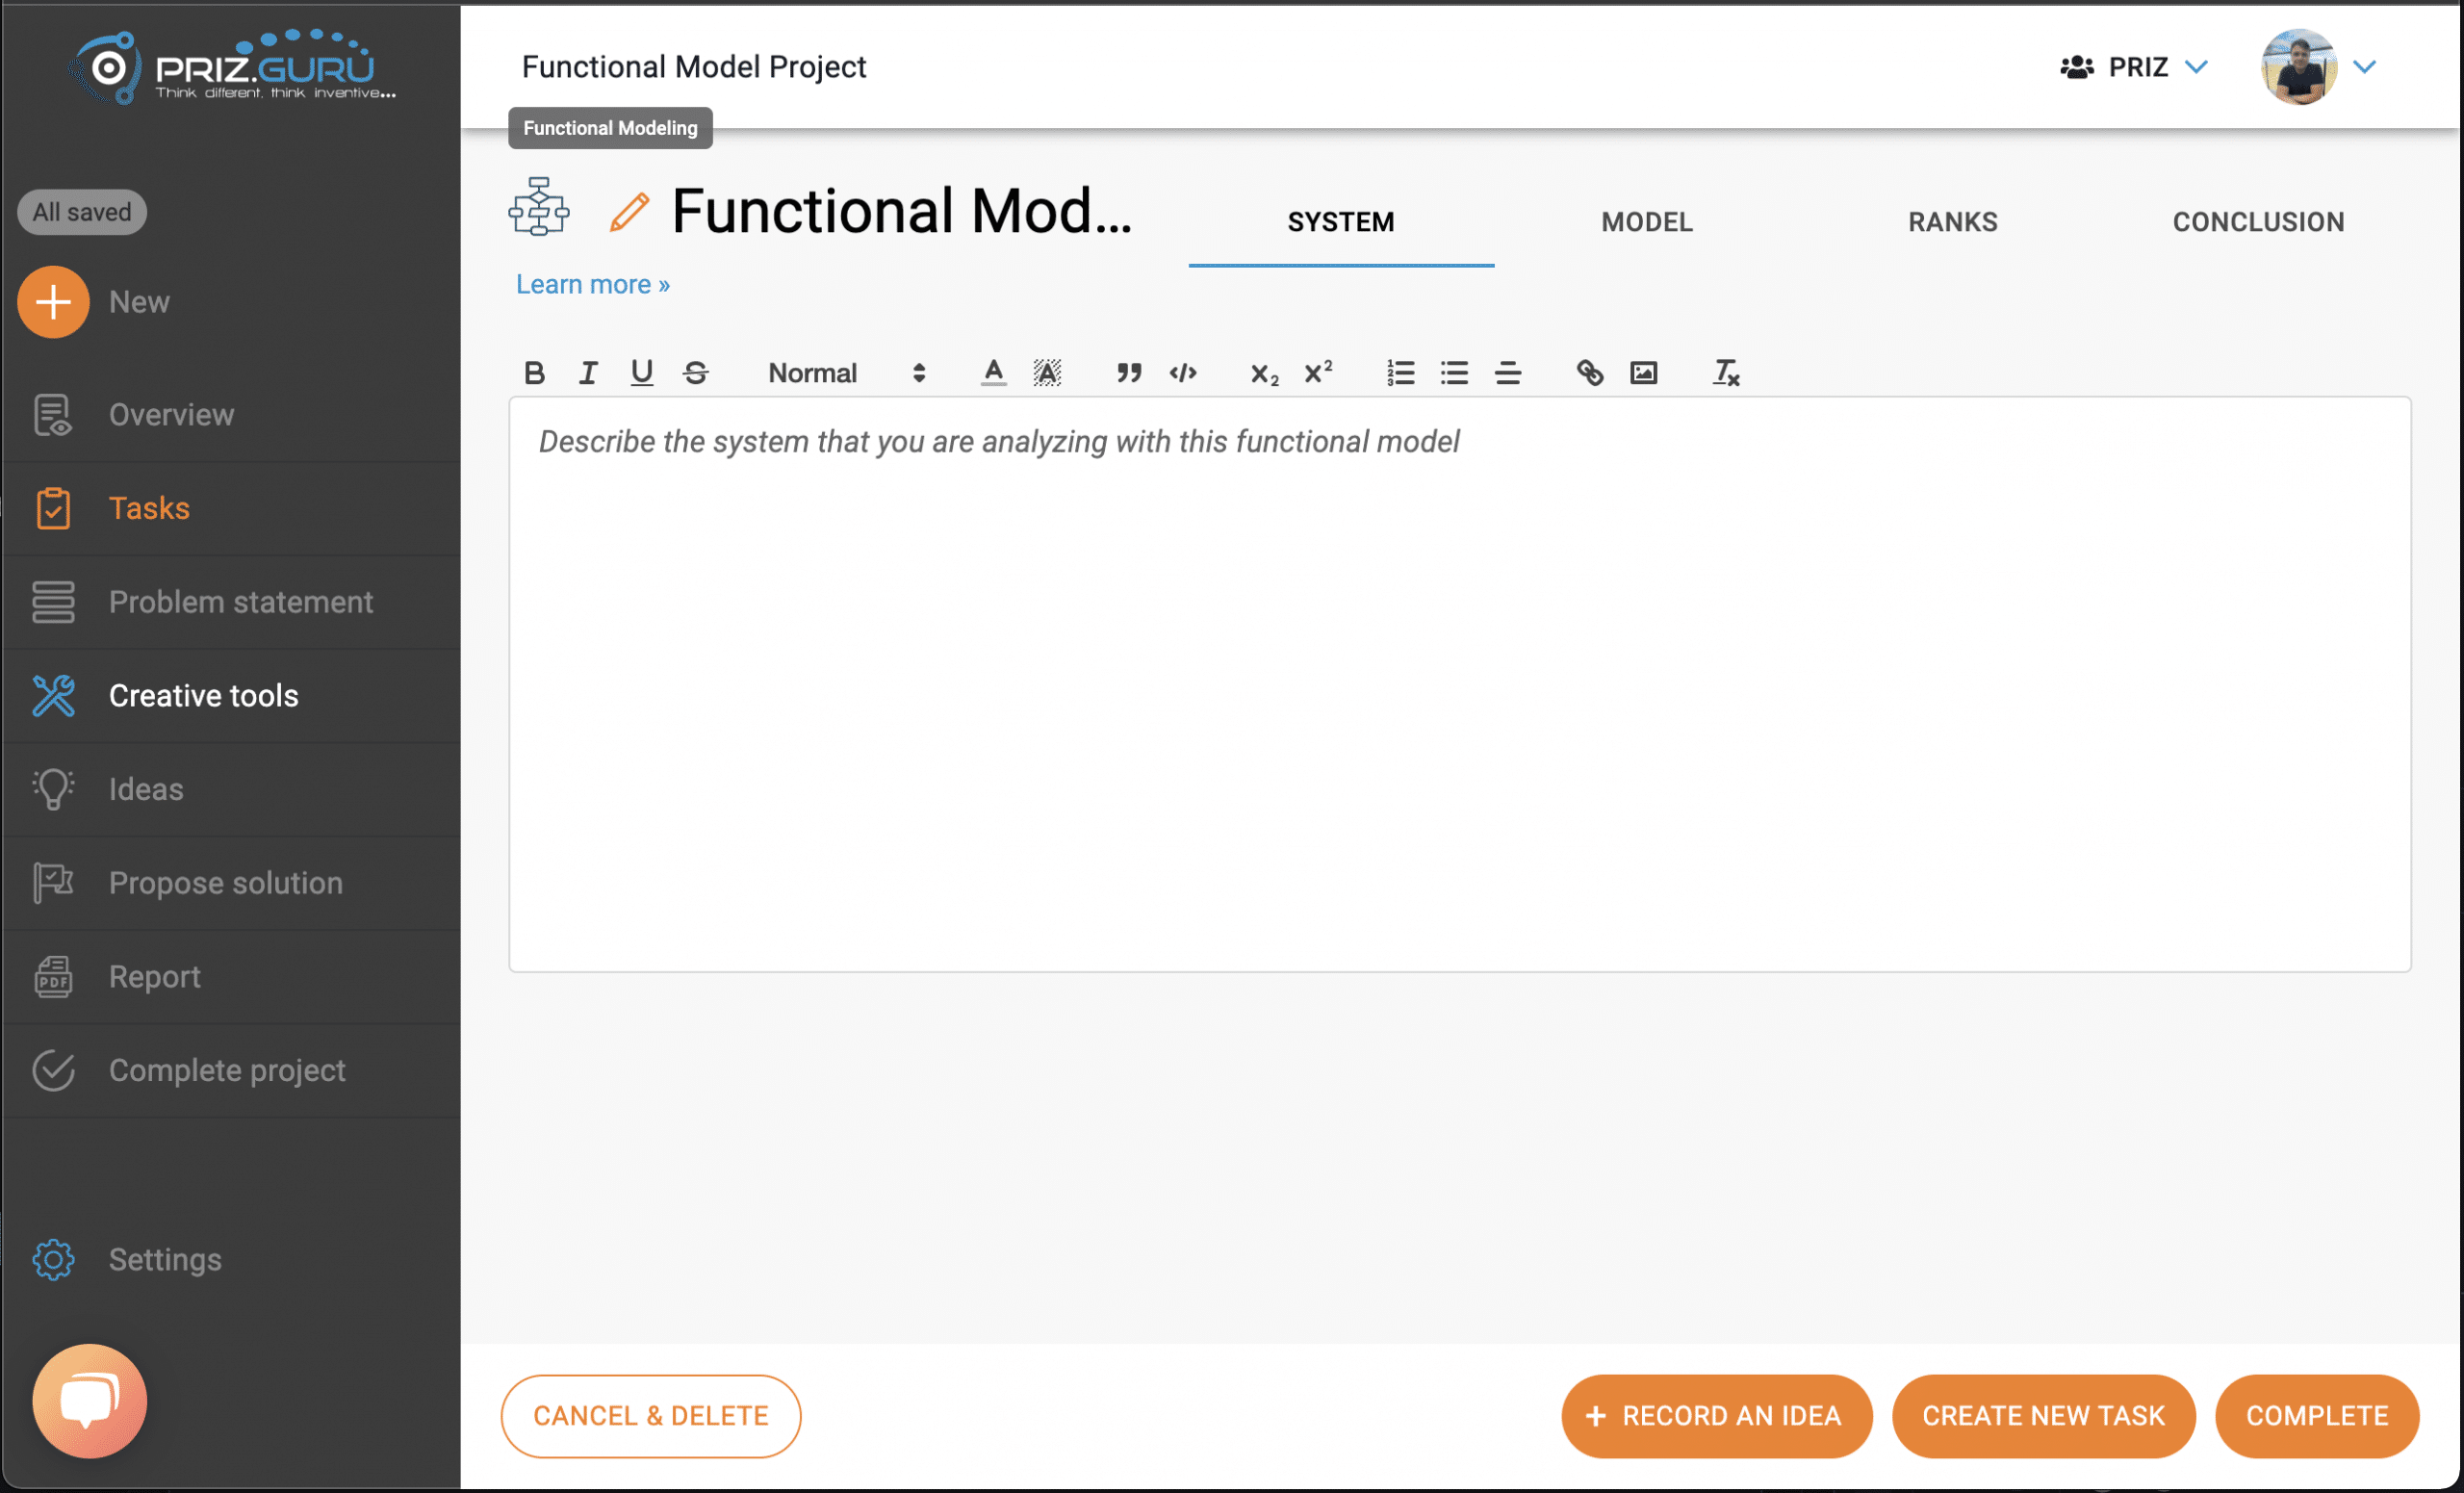
As shown in the screenshot, the system tab has a single, free form, rich text editor field. This field accepts most of the basic formatting as well as images.
The purpose of the systems field is to allow you to describe the details of the system that you are analyzing and building the function model for. It’s proven that documenting the system in your own words and having this description in front of your eyes during the analysis, help the innovator to build a better model. Also, while you and your team describe the system, it forces you to think and rethink the details that you would miss otherwise.
On another note, it is important to understand that you don’t have to create the perfect system description before moving to the modeling step. You can always come back here and add more information at any point during the process. In fact, this is was usually happens and it is normal. A team starts working on modeling the system and comes across or remembers things that have been missed initially.
Model
Here, in the model tab, you will spend the majority of your time building the functional model. This is the most important step in the tool.
The first time after the tool is prepared for use, it offers a default state with a product in place, a component, and a couple of supersystem components. There are just placeholders and can be changed in any way you deem necessary.
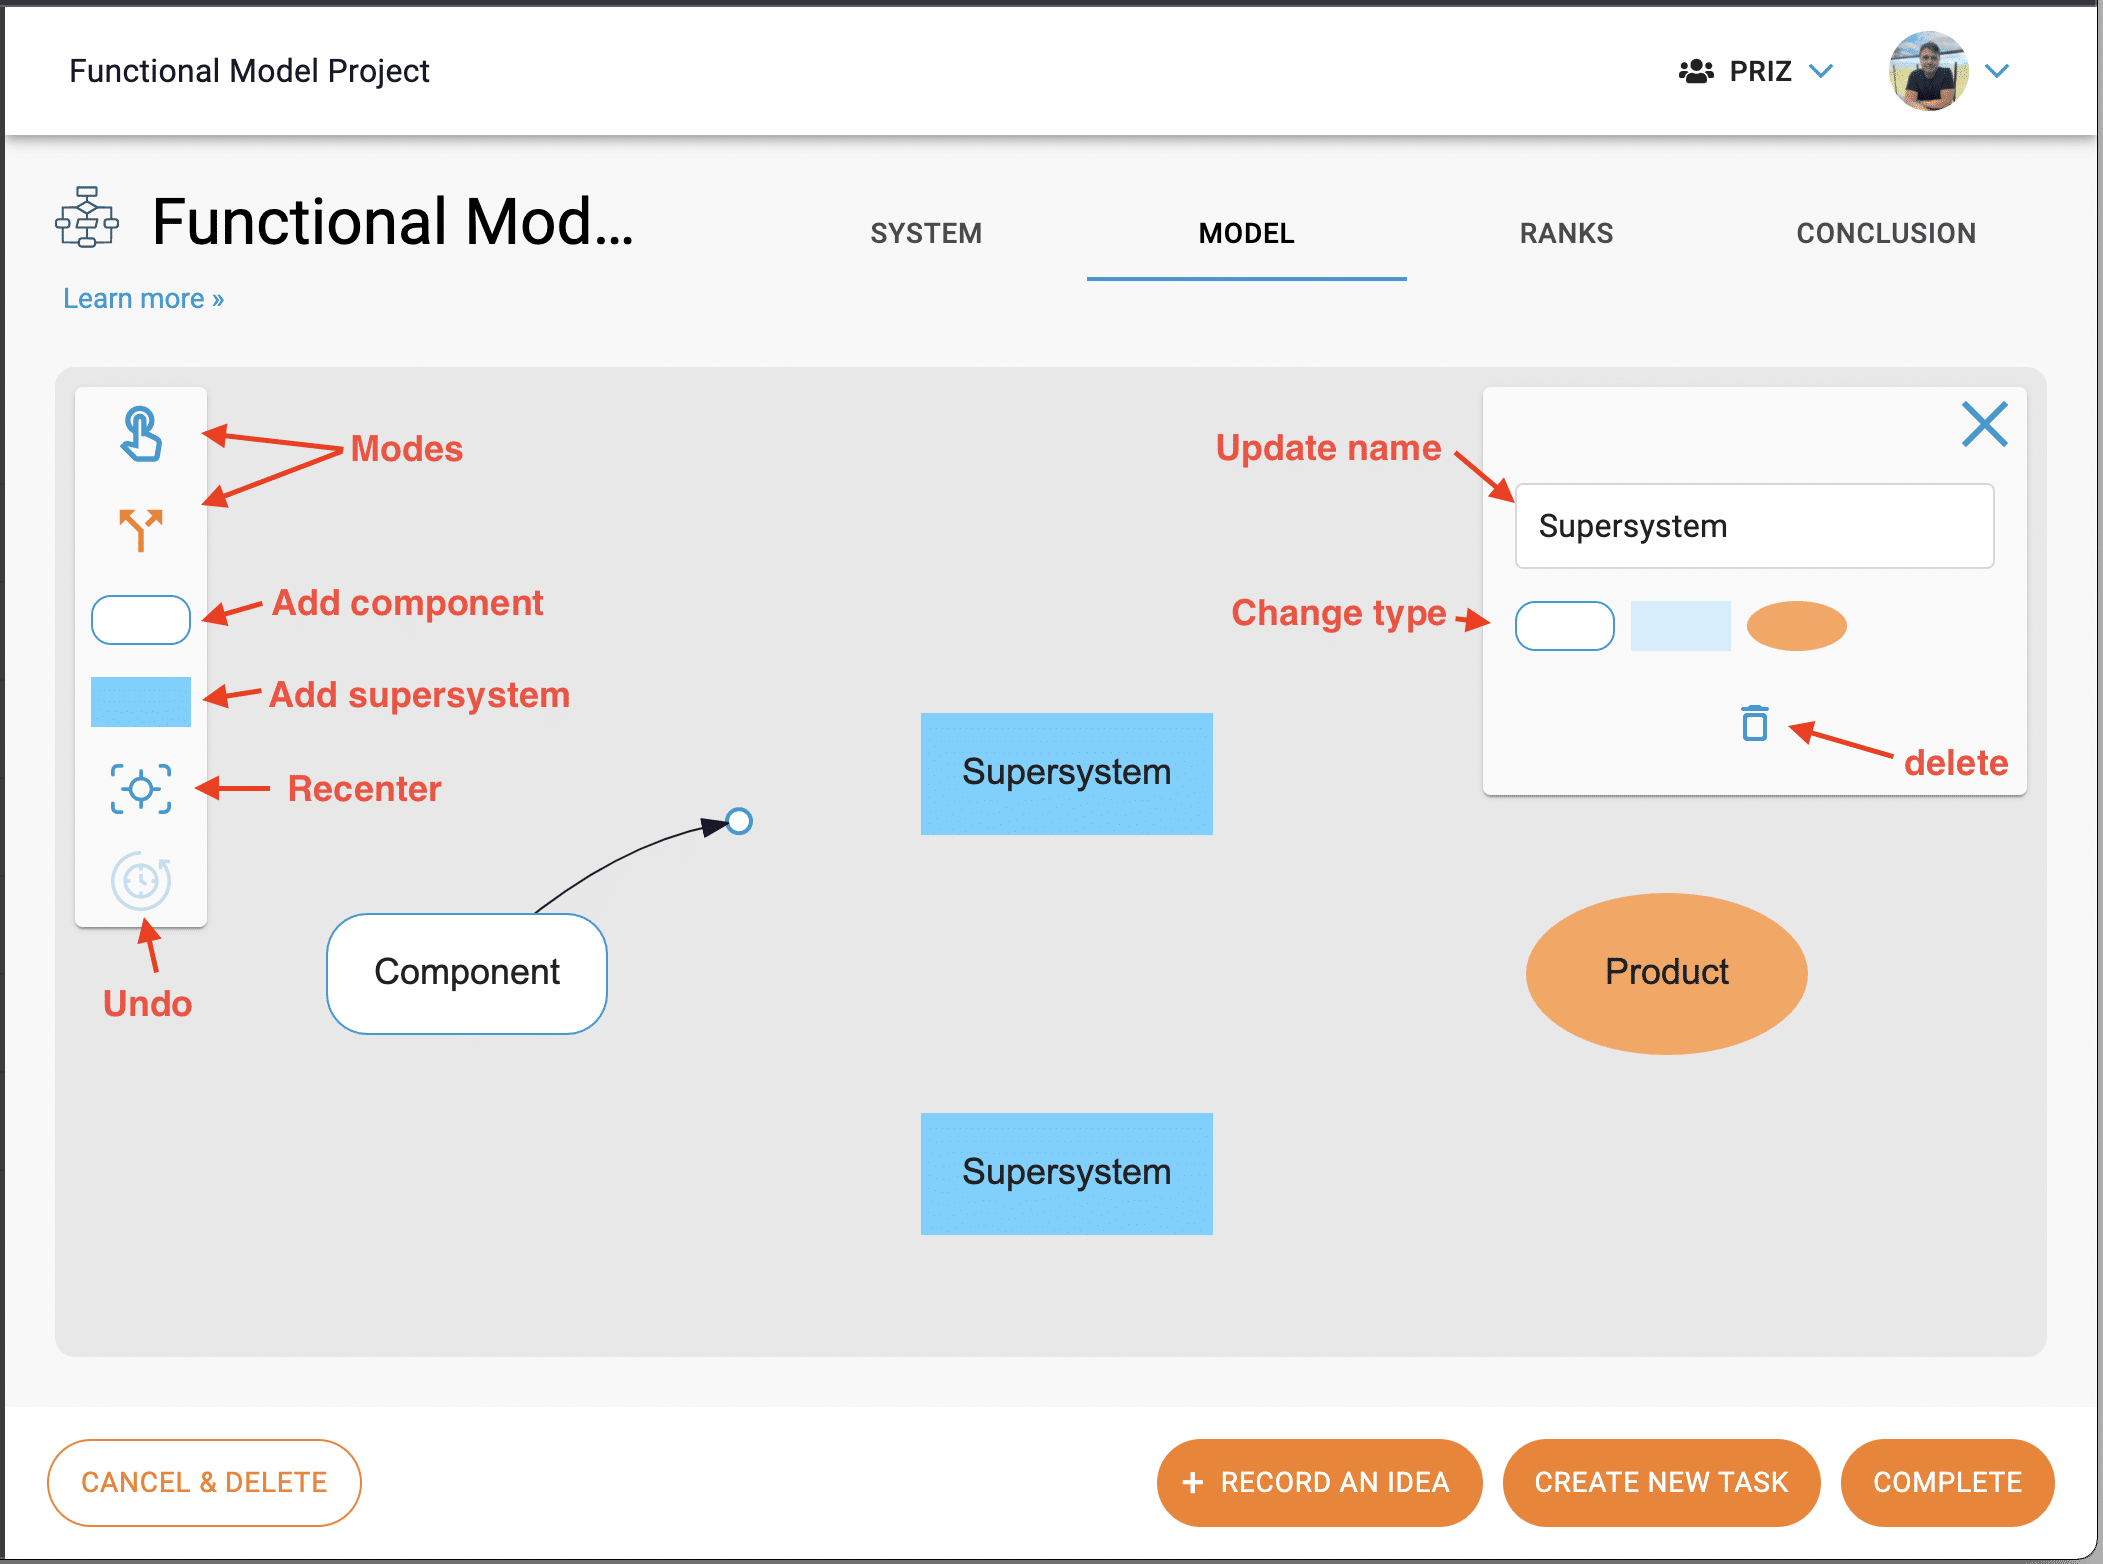
There is a lot going on in the above screenshot. Let’s try to explain all the parts.
Canvas
The main area, where the model is built, is called canvas. This is where you place all the components, subsystems, the product and connect them all according to the system that you are analyzing.
You can zoom in and out with a mouse scroll. Very convenient feature when you are working on a large model.
Controls
On the left side of the canvas, you will find the controls for building a functional model. From top to bottom:
- Mode buttons – the first top button are the mode.
First is the drag mode – allows you to drag elements by grabbing them, and the whole canvas by dragging the canvas.
Second is edge mode – allows you to connect nodes with functions (arrows) by dragging from one node (subject) to another (object).
 - Add component
 – allows you to add a component onto a canvas by either:
– dragging this button into the canvas
– by selecting the button and cklick anywhere on the canvar where you want the component to appear
Note: Another way to add a component is by creating a function without connecting to an object, once the mouse button released, a new component will automatically created. - Add supersystem
 – same as for component, but to add a supersystem node
 - Fit & recenter
 – this button is the fastest way to fit and recented the chart of the model on a canvas.
 - Undo
 – allows to undo the last change that you made.
Note: keep in mind that this allows to undo only the changes that have been done without page refresh. Once you refresh the page, the history of changes is lost. Od course, you can always undo the changes manually.
Node settings
By the term node, we mean any component, supersystem, or product.
When any node is selected, you will see its settings dialog. If it’s not shown, it is most likely collapsed and you need to open it by clicking on a hamburger button (![]() ) in the top right corner of the canvas.
) in the top right corner of the canvas.
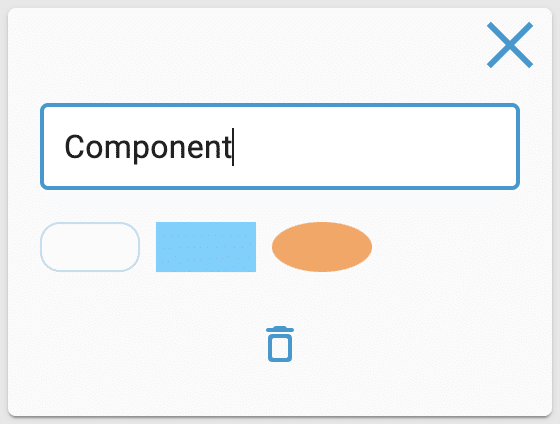
This dialog allows to:
- Change the title of a node
- Convert to another type of node
Note: since only one product is allowed in these analysis, if you convert a component or supersystem to product node, previous product node will be converted to component. - Delete the node
Function settings
Similar to nodes, functions (represented as arrows) also have their own settings dialog. To show the dialog all you need to do is select the connection (arrow) representing the function.
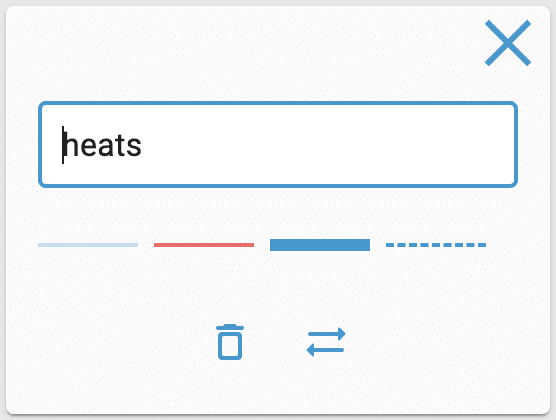
This dialog allows to:
- Change the title of an action
- Set a type of an action.
Left to right:
Normal blue -> Useful
Normal red -> Harmful
Bold blue -> Excessive
Dotted blue -> Insufficient - Delete the function
- Change direction of a function
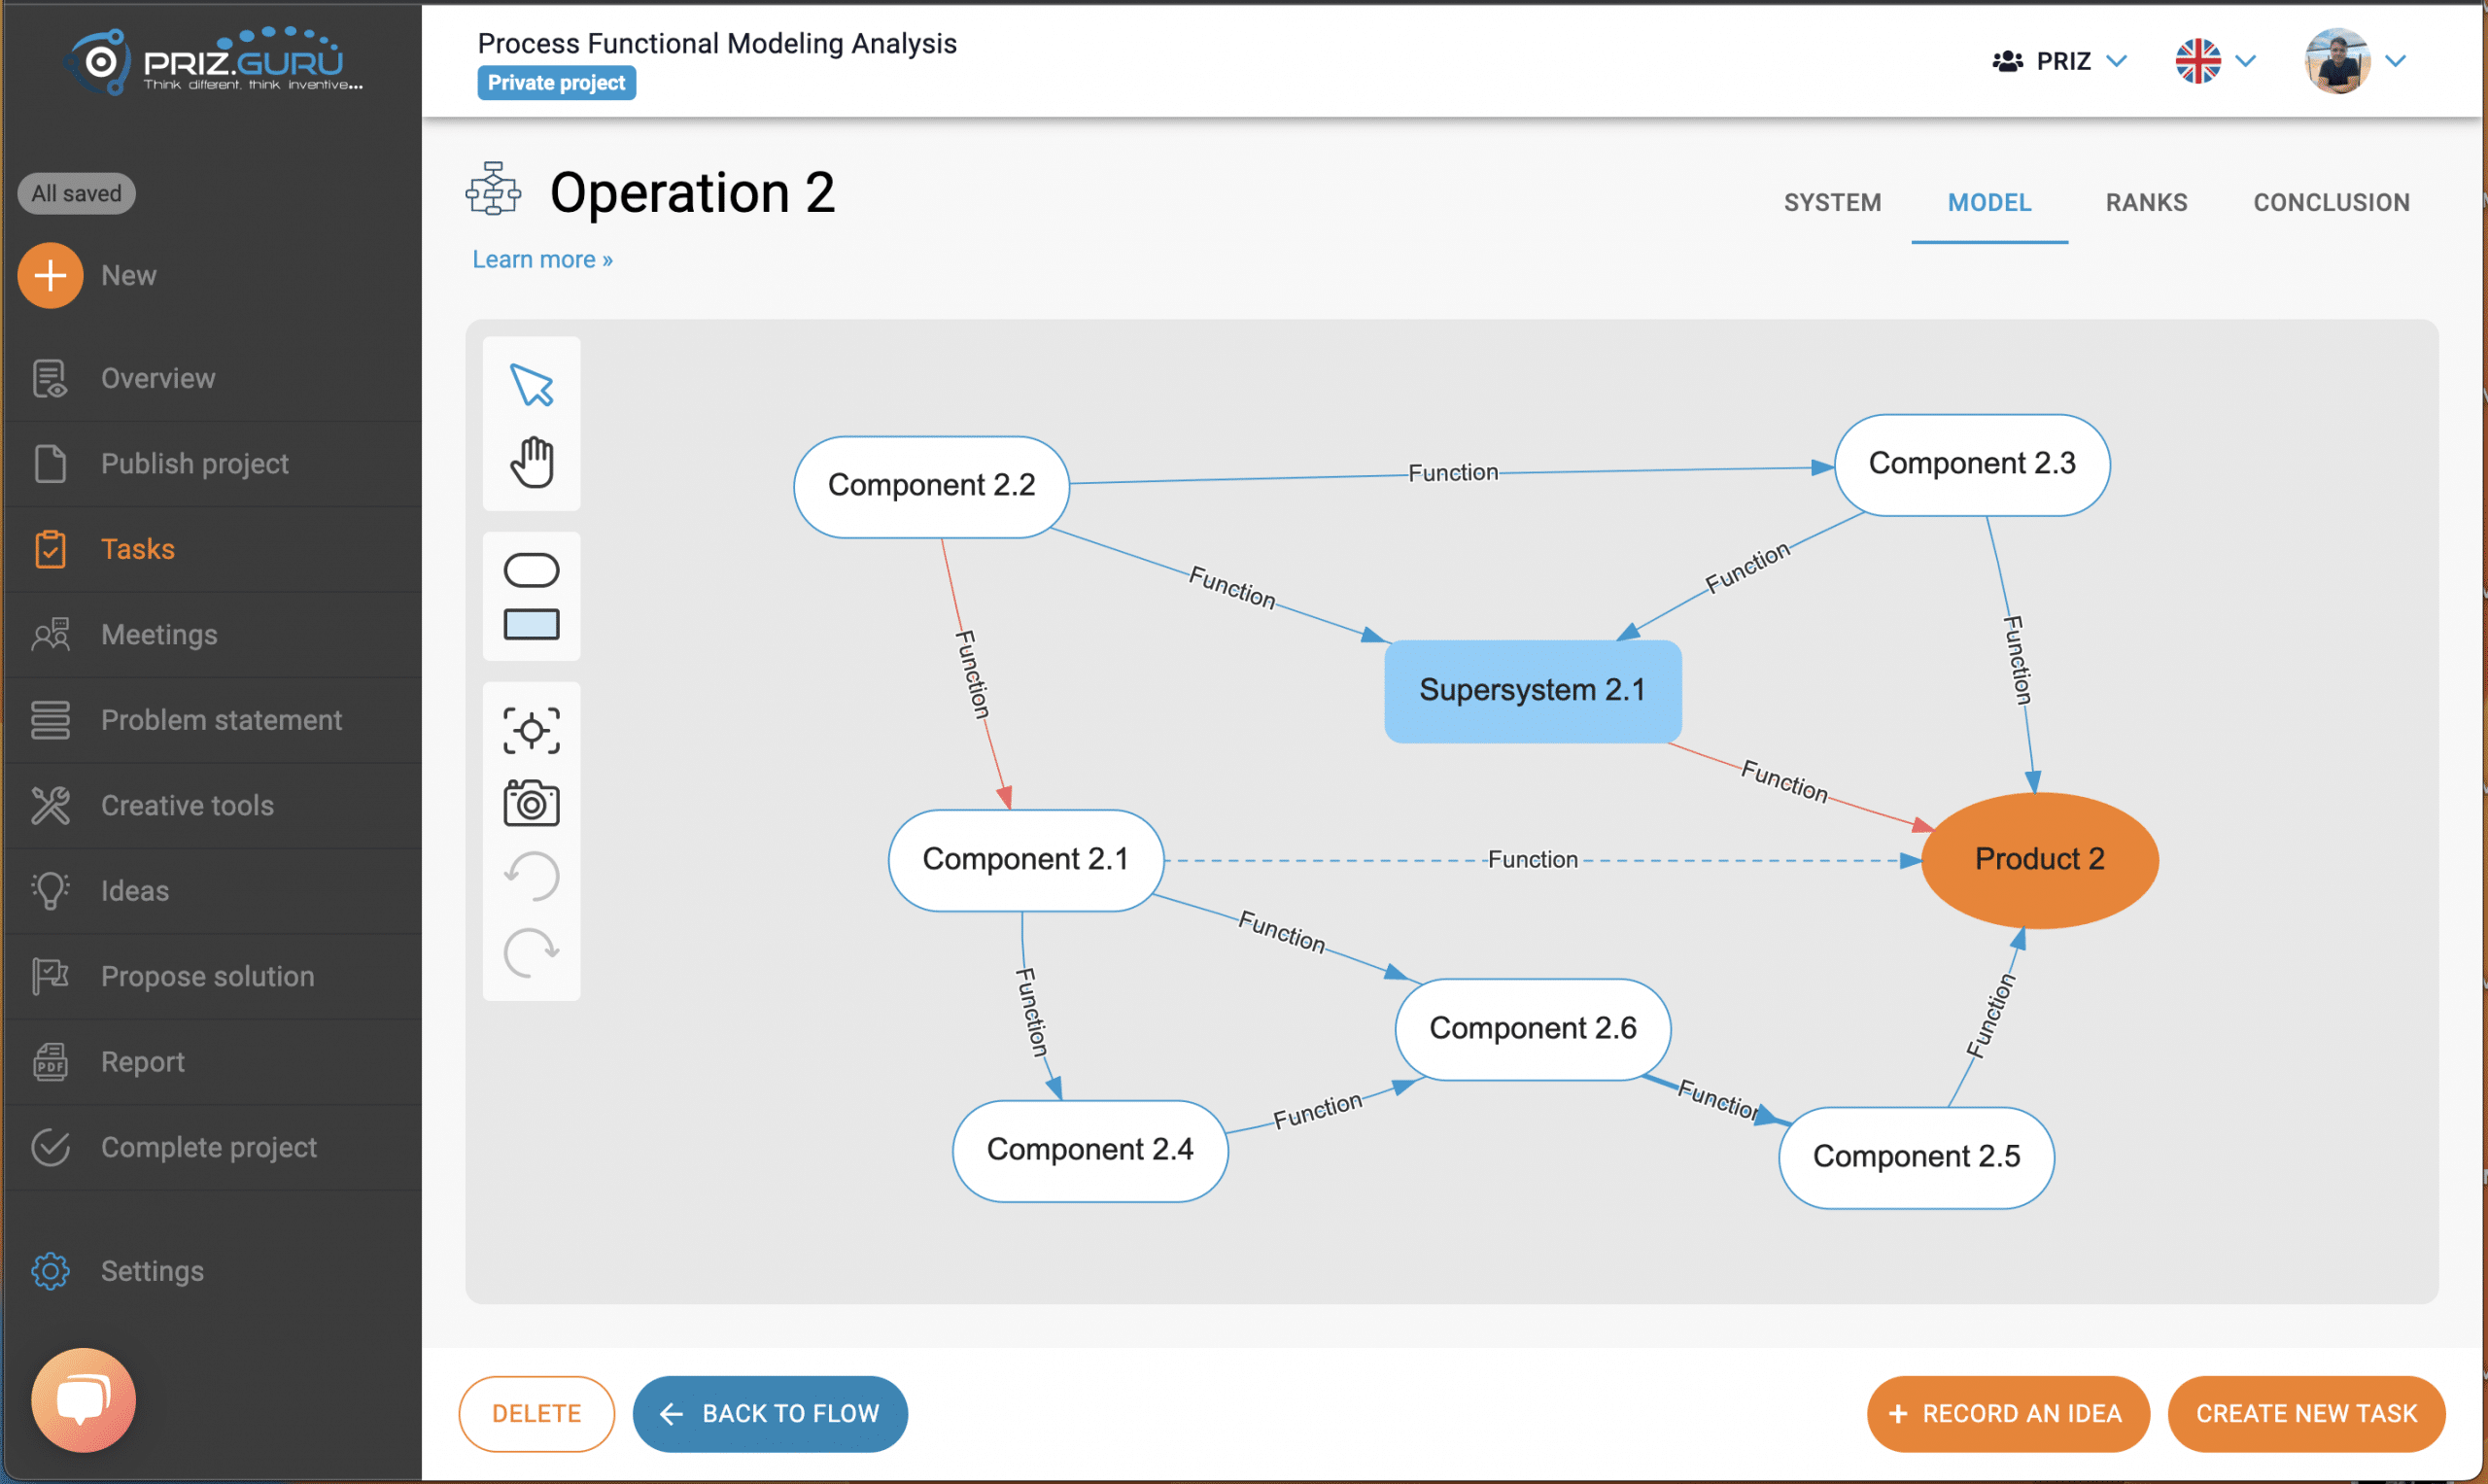
Sample of a functional model
It is normal to invest quite some time in building the model. More often than not, it is not a trivial process, but it is a time worth the investment. The resulting model might look something like this.
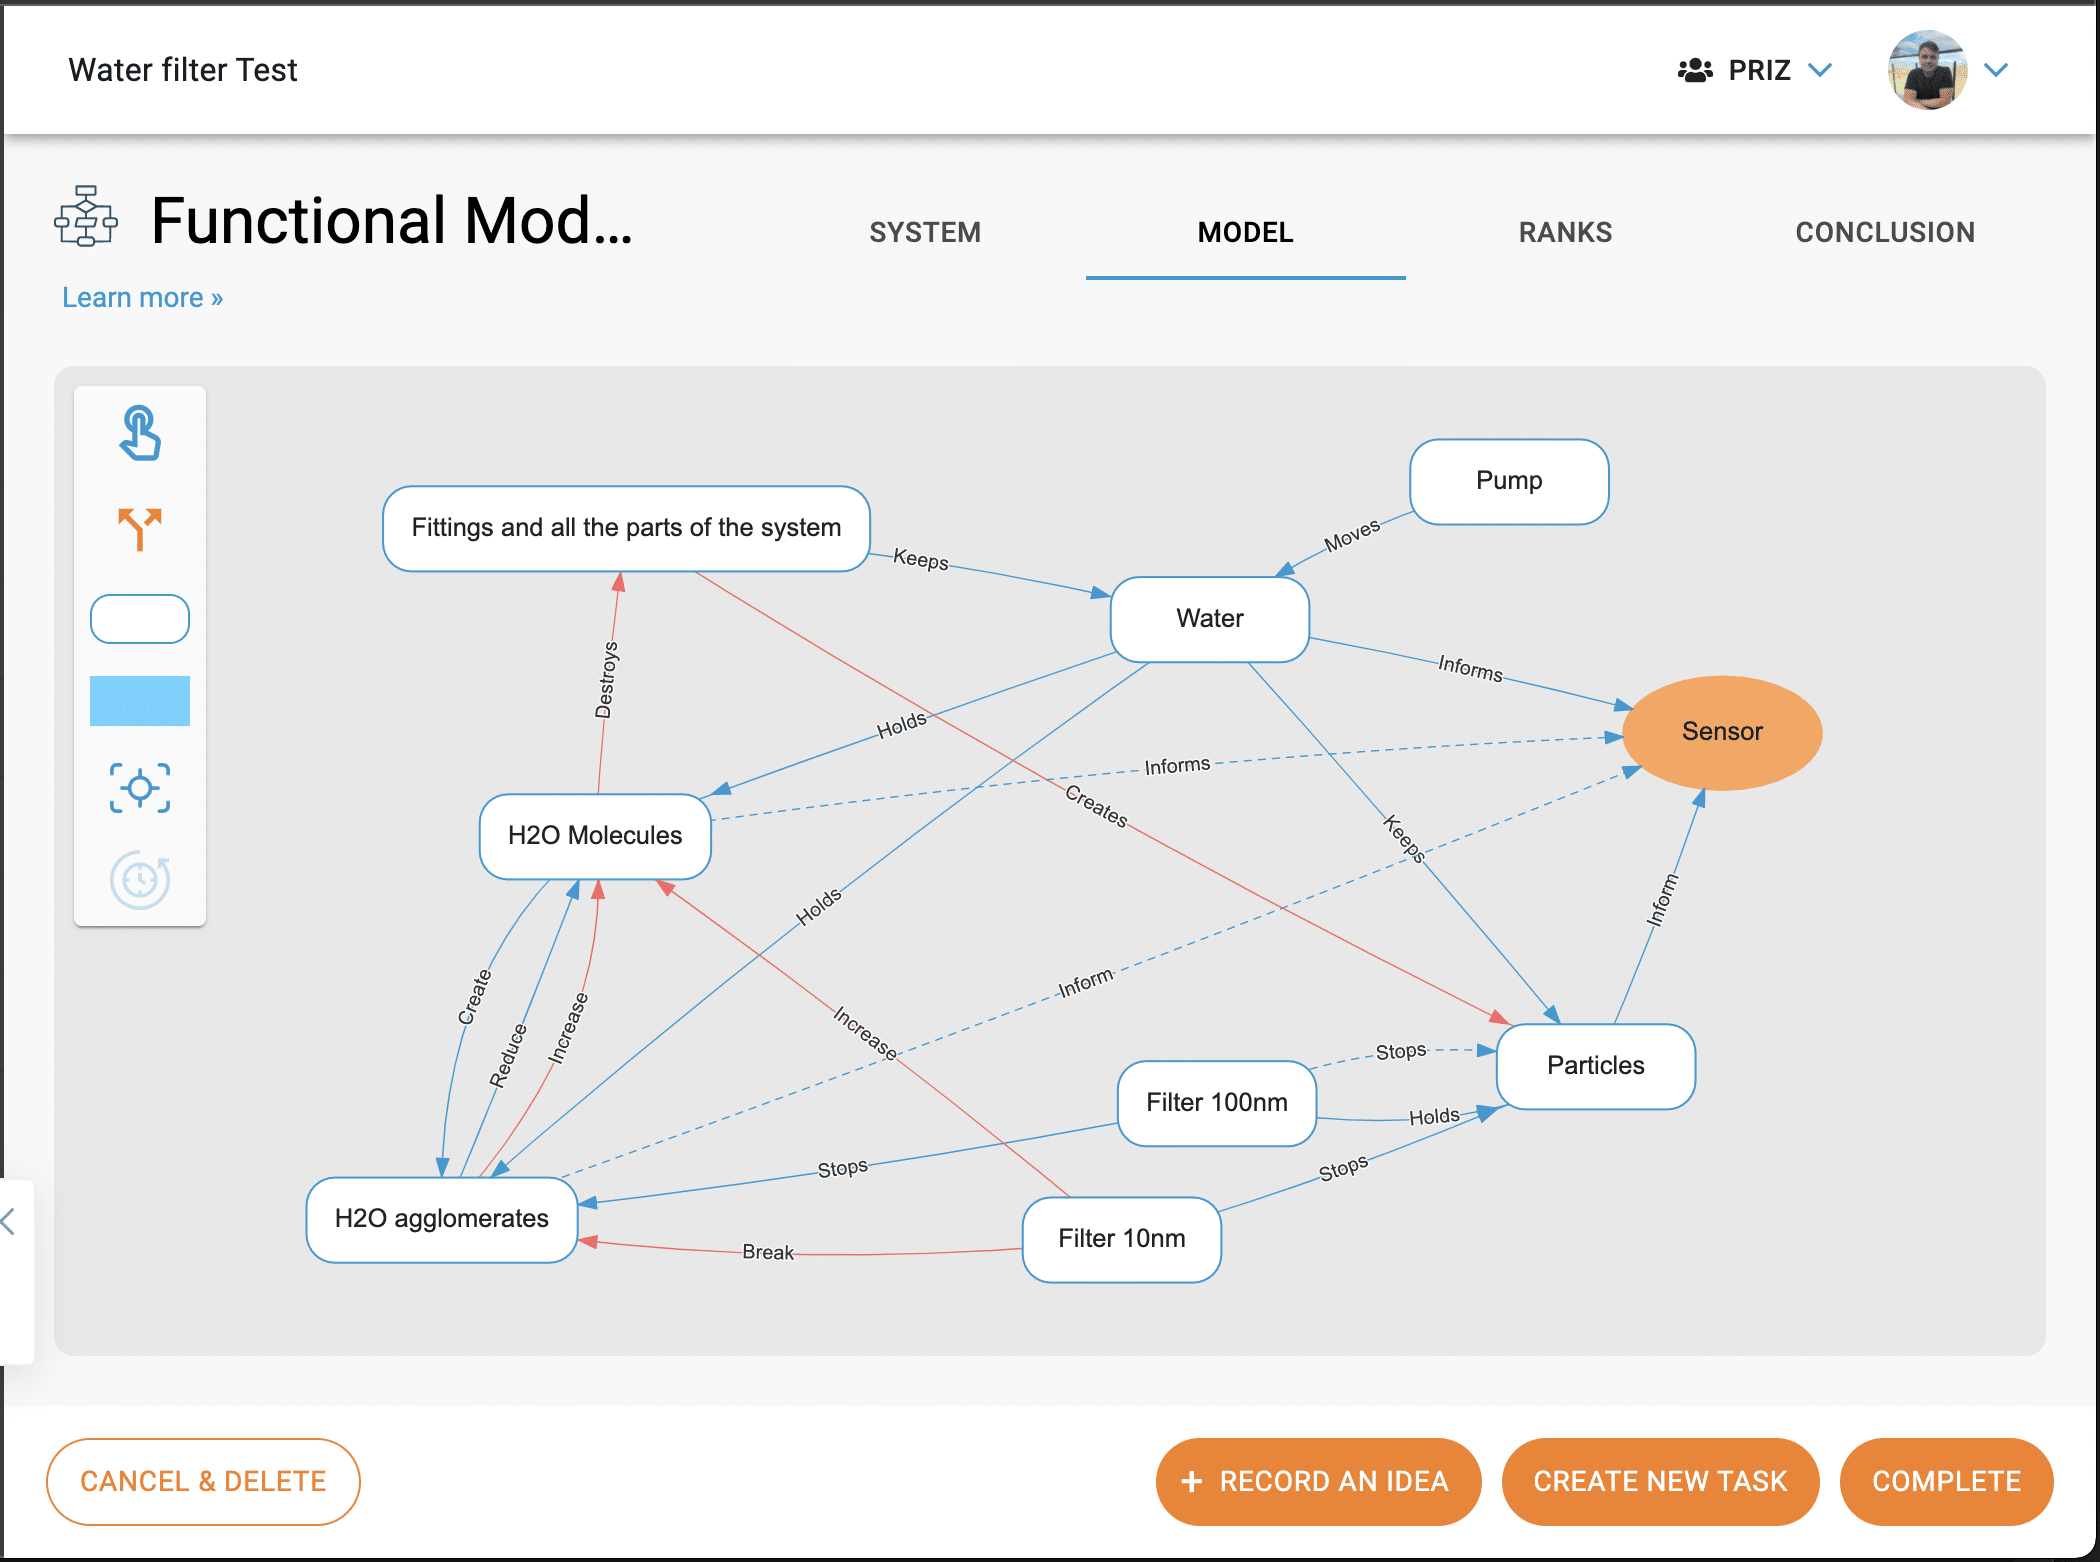
Here are some notes about the process of building a functional model:
- Define the product carefully, it is often not obvious but extremely important, and many types depends on the failure you are anlyzing.
- It is adviced to building the model without investing much effort into thinking about the type function. Replecate the functional reprecentation of the system first.
- Once you are ready, start thinking about how should the system may produce the failure that you are trying to solve. Reminder: the goal is to build the model of a failure.
- The process of building a functional model is a thinking process. Try treating it as a game, like a puzzle. Play with the parts, components & functions. Add components that you potentially missed, and remove the ones that no longer important.
It’s a thinking process and should be treated as such
Results
When you think you are finished with building a model or at least getting close to it, it’s a good time to start looking into the results. The results are automatically calculated on the fly on any change of the model, so it is always up to date.
For the model shown above, the results look like this
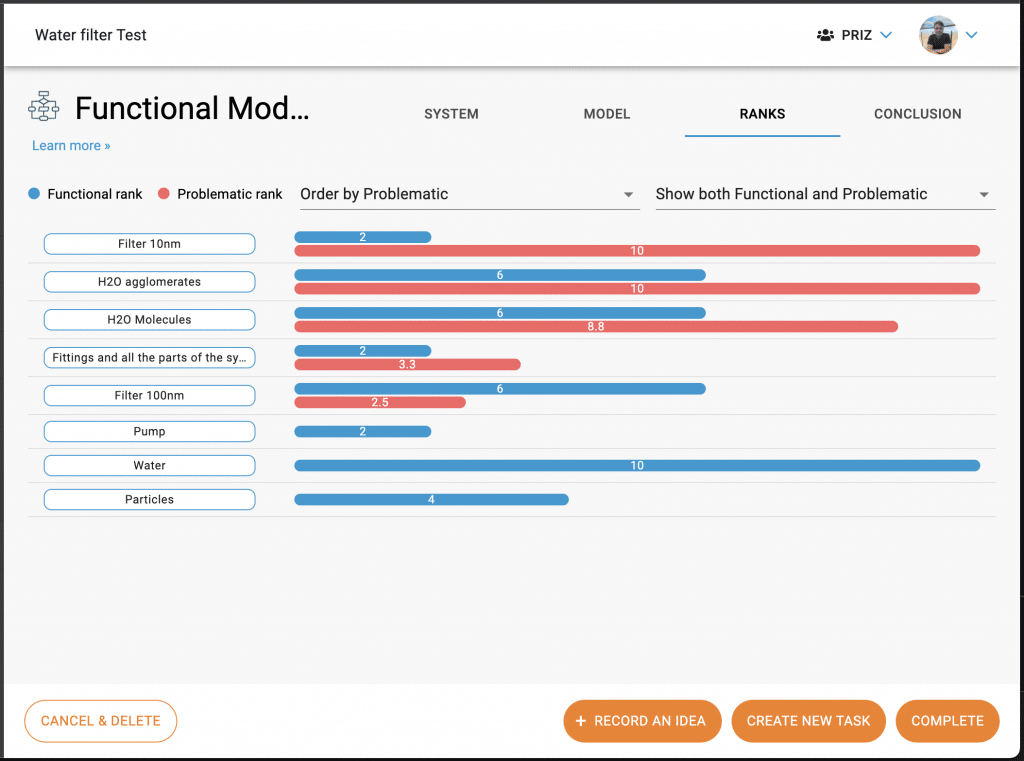
This chart is showing the function and problematic ranks of every component that you have in your system. Components with the highest problematic rank are the ones contributing the most to the problem related to the problem. While the ones with the highest functional ranks benefit the product the most.
At this point, the rule is simple. If you want to solve a problem, you should reduce the effect of problematic components and increase the functional rank of others. However, the ideality concept suggests that you should try and remove problematic components altogether and delegate their functionality to other components, the most functional components.
In many cases, when you remove a component, you lose an important function. That means that you can build a contradiction:
If I remove component A, the problem will disappear but will lose some functionality.
Having a contradiction is great because we can solve this contradiction with a help of Inventive Principles tools.
Conclusion
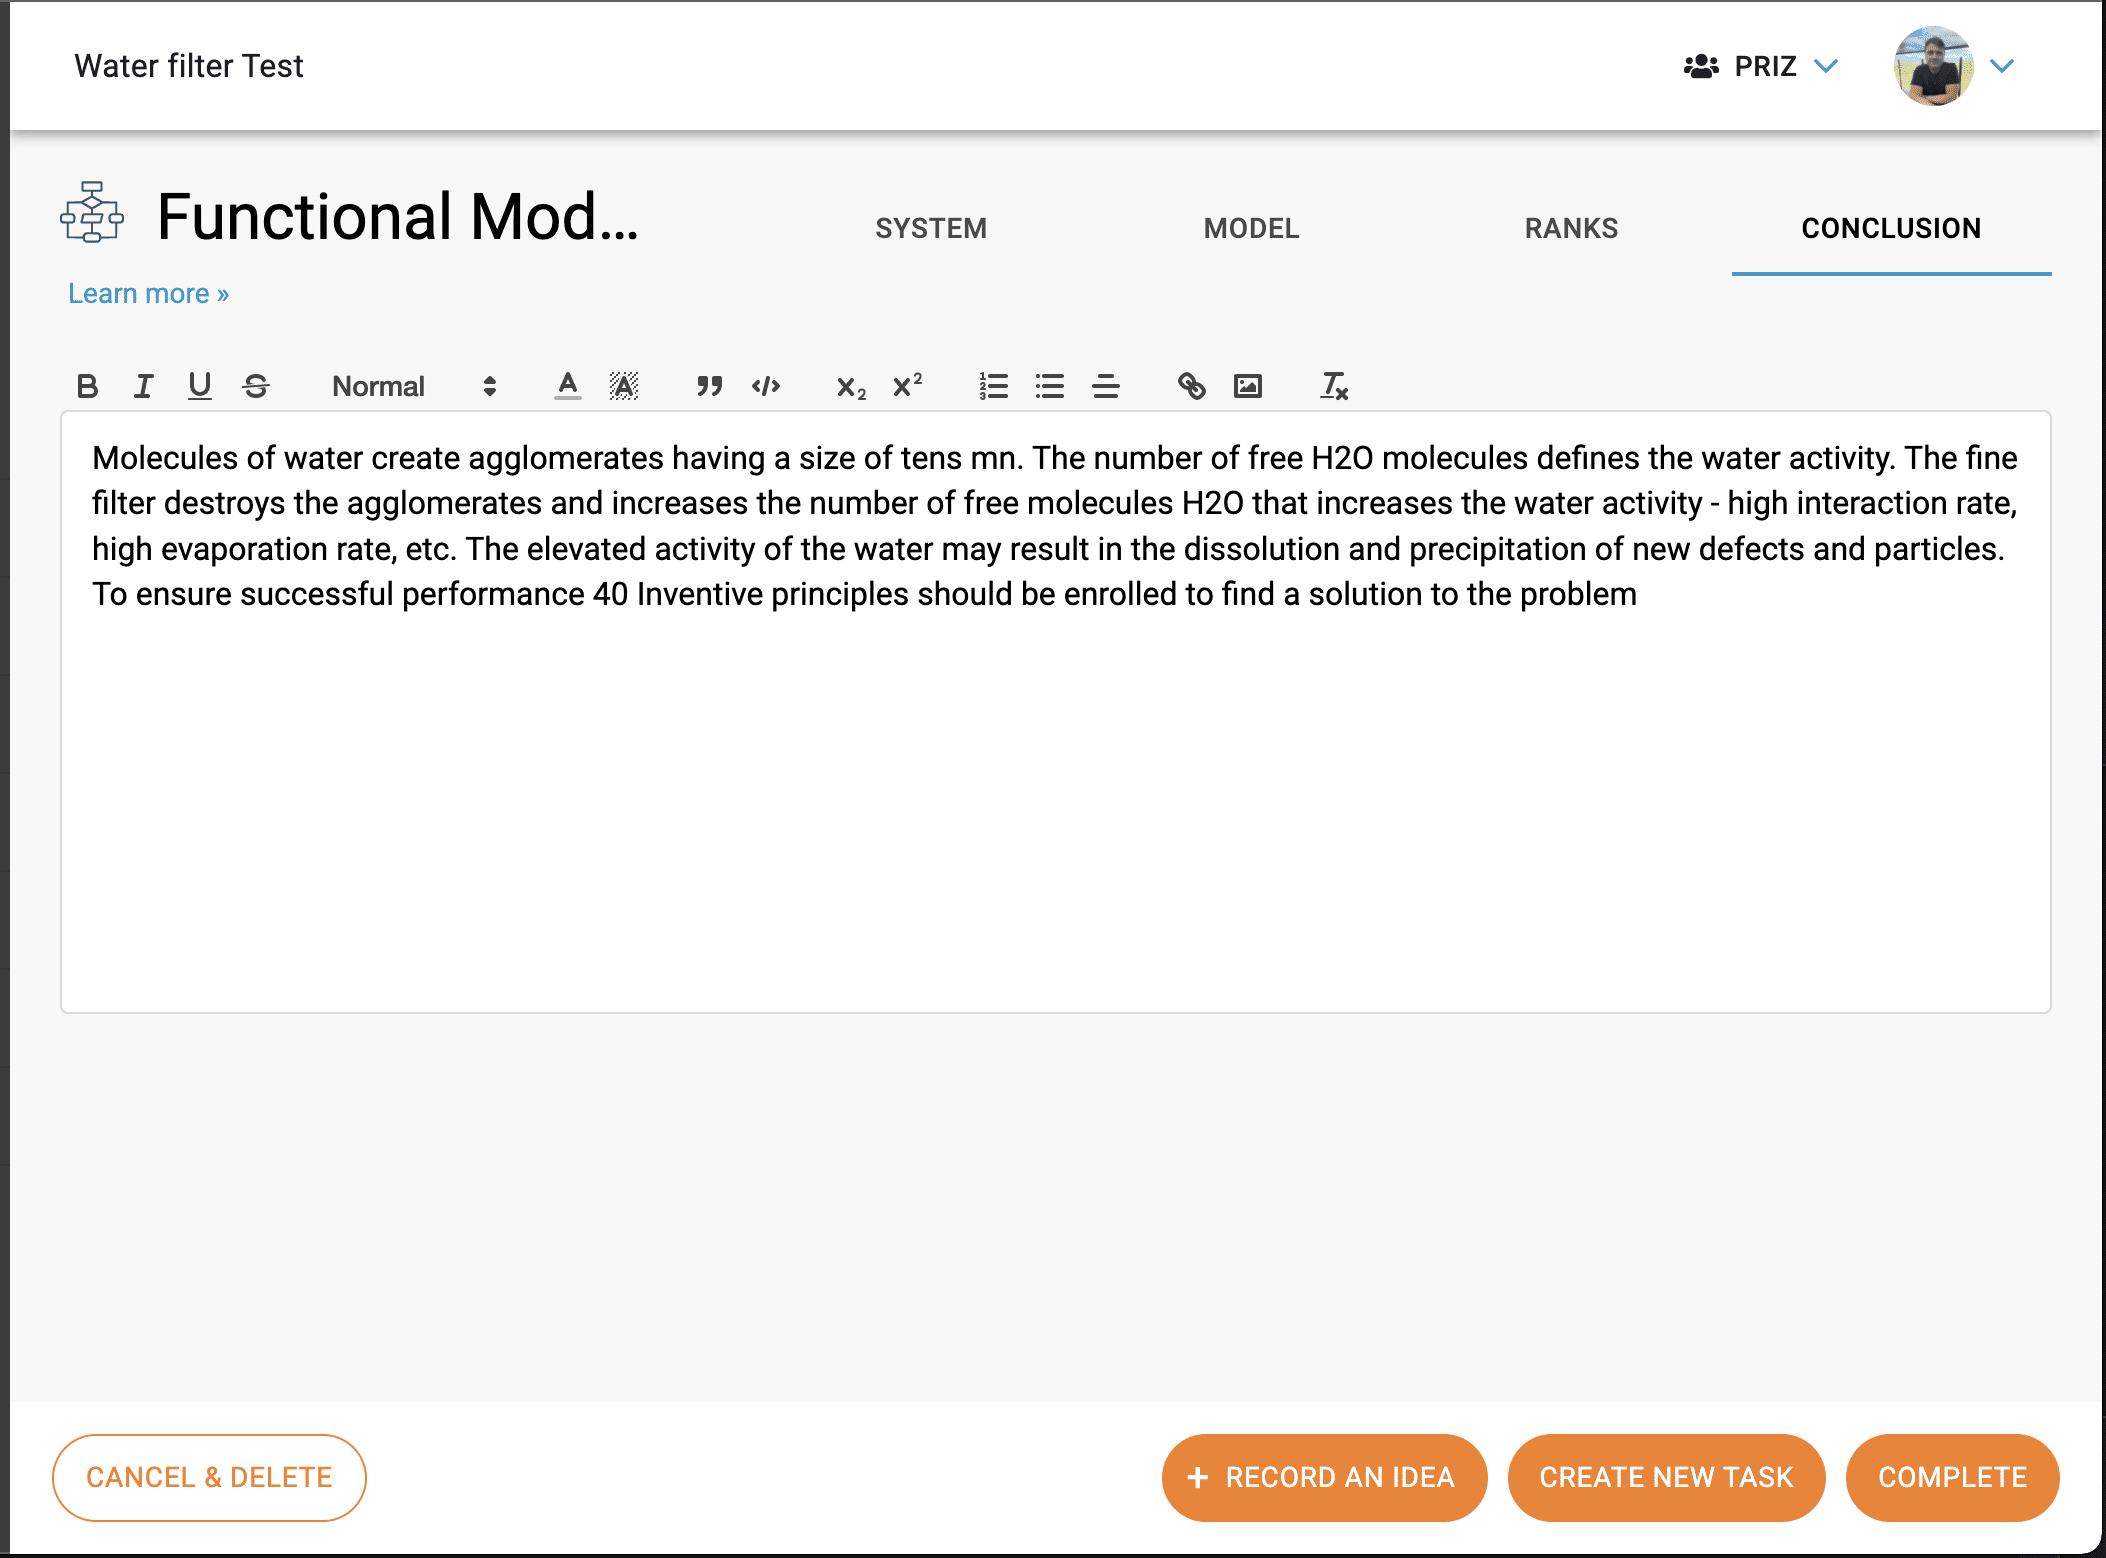
The conclusion tab is the place where you can document any conclusions that you have as a result of functional model analysis. This is a free format rich text editor. Similar to the system tab, you are welcome to have any information you feel is useful for you, your team, and your leadership. The conclusion will also be included in the final report with anything else related to your work with this tool.
Tool controls & final notes
Like any other tool, functional model also has controls at the bottom of the page.

These controls are always visible while you are working on any tool.
Cancel & Delete button allows you to delete one particular use (instance) of a tool, in case you decided that you don’t need it.
Record an Idea button allows you to record an idea at a project level at any point in time. These ideas are collected in ideas manager.
Create New Task button allows you to create a new task without leaving a tool. Just imagine that, while working on a tool, you and your team decided that there is something that you need to do. This is how you would record that task.
Complete button allows you to complete the usage of a tool and lock all the related data. The data will stay available for viewing, but not for editing.
Contact us with any questions.